COMS 4733 - Team Lab 1, due
2/6/07 before class
MoverGUI
Preliminaries
- Download and read the PER robot
documentation. It can be found at http://www.cs.cmu.edu/~personalrover/PER/
- Install the PER API and
the Java 2 SDK on your
machine. The PER
documentation has details. Compile the PERFilesystem.
-
when compiling PER/basicGUI/TestSuite.java,
if you get an
"incompatible types" error on line 1700 try this: go into the file at
line 1665 and change the declaration from float to double
- Download and compile MoverGUI.java and PERController.java.
Description
(100 pts) We would like you to implement the robot control logic for MoverGUI, displayed below:

The interface should function as follows:
- when the user clicks within the window, waypoints are added to the path for the PER to follow
- when the Reset button is clicked, the path is removed
- when the Follow Path button is clicked the PER will drive along the path. In driving along the path, the PER must first rotate towards the proper direction, and then drive directly forward.
- after the user has followed a path, the display of the PER (as represented by the red arrow) will be updated correctly, relative to its starting position and orientation.
-
- when the Close Path checkbox is checked, the path will be closed, meaning at the end of following the waypoints, the PER will drive from the final waypoint back to the starting position.
- when the Take Images checkbox is checked, the PER will take an image (using the onboard webcam), at each waypoint, as it traverses the path.
- Note: You should have a
scaling factor in your code that makes the conversion from distances on
the screen (expressed in pixels) to real-world distances. Experiment to find something reasonable.
API Suggestions:
Use TurnToAction to first rotate the PER to the correct direction, and then use DriveToAction to drive the appriopriate distance. Do not use the
DriveToAction's theta arguement (set it to 0); certain values seem to crash the PER's onboard software. Also, when calculating the angle
to travel, it is recommended to use java.lang.Math.atan2, not java.lang.Math.atan. The difference is that atan accepts only the final angle (limiting the range to -pi/2 to pi/2), whereas atan2 accepts both the numerator and denominator.
This way the actual angle is correct, relative to the signs of the two expressions. For example, calculating the angle between the origin and (1,1)
would return the same angle as (-1,-1) using atan ((1/1) = (-1/-1)).
Odometry error and calibration:
when your interface is completed, define a closed path and ask the
robot to drive along multiple times. Notice how positioning error
accumulates each time around the circuit. After a couple of times
around the circuit, the robot might end up in a completely different
position relative to the starting position, due to the accumulating
odometry error. This might be partly corrected by carefully calibrating
the robot. Read the PER Calibration
documentation and check your robot's calibration.
Physical access to the robots:
we are in the process of setting up the environment where you can run
your programs on the PER robots. While we will try to provide as much
access to the robots as possible, we still encourage you to develop and test off-line as much of
your code as you can, and move on to running the robots once your code
is stable and in good condition.
Extra Credit
- Use the PER's infra-red range
sensor to check for obstacles. While the PER is following the
path, if an obstacle is detected in front of the robot, the PER must
stop and the MoverGUI must
inform the user that an obstacle was detected.
- After an obstacle has been detected the PER must find a way
around it and than continue on its path. Assume the obstacle is cylindrical and of known radius (which you can measure), and use range sensor
readings to determine its location. For example, while panning
the range sensor left to right, store three readings: the leftmost
reading of the obstacle, the one that is closest to the robot, and the
rightmost reading. You can than fit a circle to these points to
determine the location and size of the obstacle.
- Once you have determined which direction the PER will take around
the obstacle, add one (or more) new
waypoint(s) on
the path so that the PER will navigate around the obstacle and then
continue along the previously defined waypoints. Be sure to leave
enough space for the body of the robot to clear the obstacle. See the
figures for an example:

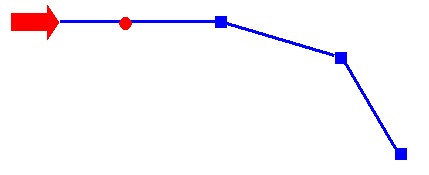
- An
obstacle is detected while the robot is
driving along the specified path.

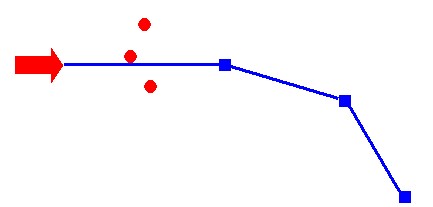
- We
know the obstacle has a cylindrical shape; by
panning the range sensor the robot acquires the range readings of multiple points on the object.

- A circular
shape is fitted to the points
described above, giving the robot a description of the obstacle. A new waypoint
is added to the path taking the robot around the obstacle.
Note: Full extra credit is given when the the program can successfully locate the cylindrical object. Partial extra credit will still be given if the PER is able to at least avoid and drive around the object, if it cannot be precisely located.
Submission
- Deadline: 2/6/07 before
class starts
- What to submit: all your
source code.
Also attach a README file with
detailed compilation instructions, and
your custom Makefile (if
any). Please put all your files into an archive bearing your group's name (RedTerror_hw1.zip for
example). If you use eclipse, feel free to just export an archive file of your workspace.
- How to submit: via email with "[CS4733]-HW1" in the subject line to
dal2103@columbia.edu.


